
Flipkart Seller Registration Process: Step-by-Step Guide for Beginners in India
If you want to start an online business in India, understanding the flipkart seller registration process is the first step. Flipkart is one of the largest eCommerce platforms in India, allowing you to reach millions of customers. In this guide, we will explain the flipkart seller registration process in a simple, beginner-friendly way so you can start selling without confusion.
Why Flipkart is a Great Platform for New Sellers
Before diving into the flipkart seller registration process, it’s important to know why Flipkart is ideal for beginners:
Access to a massive customer base across India
Easy onboarding through a simple Flipkart seller account setup
Built-in logistics support via Ekart
Strong brand trust that improves conversions
For anyone looking to sell on Flipkart India, this platform offers low entry barriers and high growth potential.
Flipkart Seller Registration Process: Step-by-Step
Let’s break down the flipkart seller registration process into simple steps.
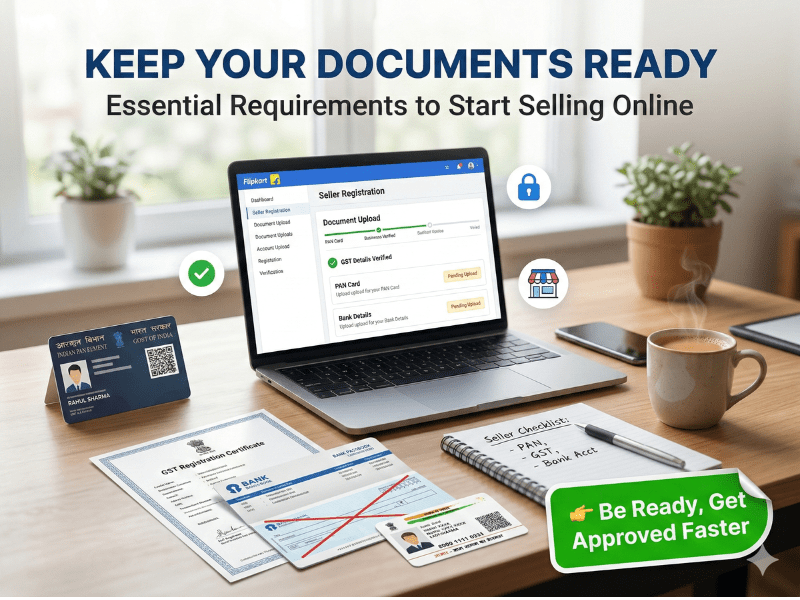
Step 1: Keep Required Documents Ready
To start the flipkart seller registration process, you’ll need:
GST Number (required for most categories)
PAN Card
Bank Account Details (with cancelled cheque)
Active Mobile Number & Email ID
Business Address (for pickup and returns)
💡 Tip: Some categories may allow selling without GST under specific conditions.
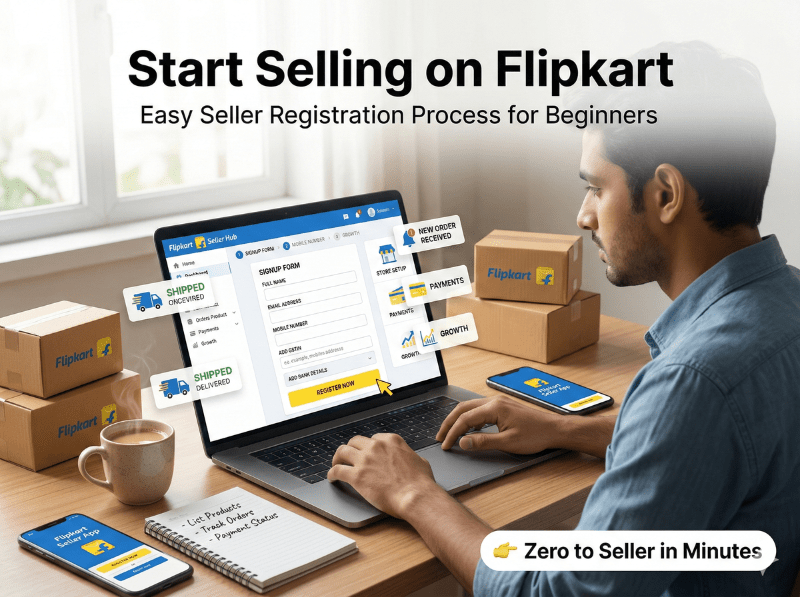
Step 2: Create Your Flipkart Seller Account
Visit the Flipkart Seller Hub
Click on “Register Now”
Verify your mobile number via OTP
Fill in basic details
This step sets the foundation of your flipkart seller registration process.
Step 3: Add Business Details & Pickup Address
Now enter your business information:
Business Name (as per GST)
Pickup Address (where products will be shipped from)
Return Address
📦 Accurate details are crucial for smooth operations and delivery management.
Step 4: Product Listing Basics
Once your account is ready, start listing products:
Write SEO-friendly product titles
Upload high-quality images
Add clear and detailed descriptions
Choose the correct category
This is a key part of your online selling India guide, as your listing directly impacts sales.
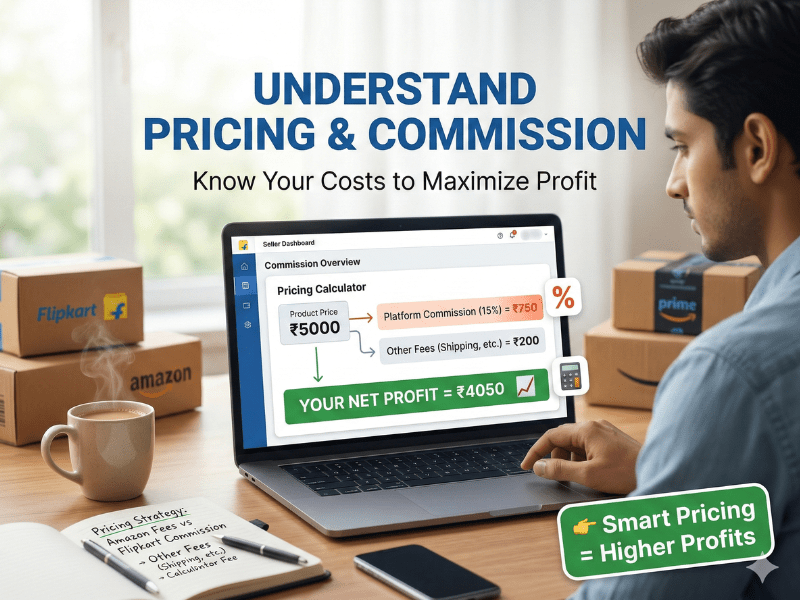
Step 5: Understand Pricing & Commission
Flipkart charges different fees:
Category-based commission
Shipping charges
Fixed closing fees
💡 Beginner Tip:
Start with competitive pricing to gain traction and increase your chances of getting early orders.
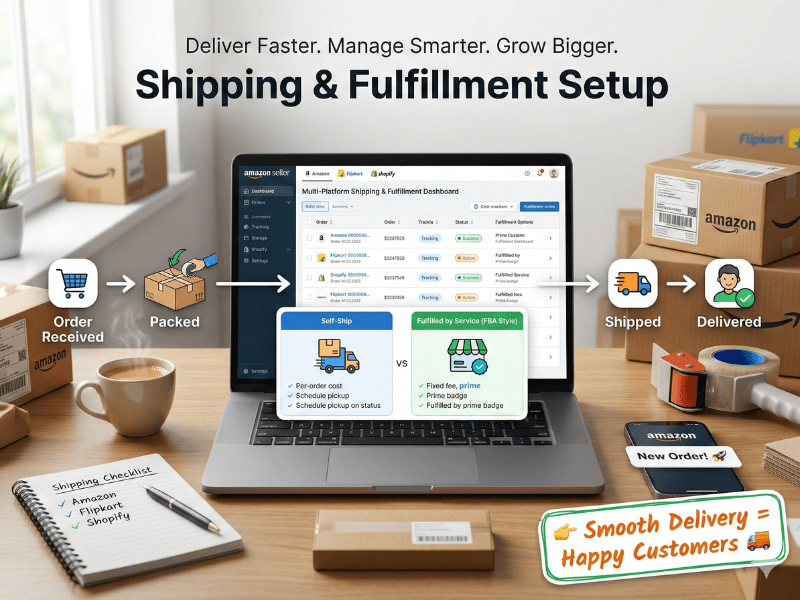
Step 6: Shipping & Fulfillment Setup
Flipkart offers two fulfillment options:
Flipkart Fulfillment (F-Assured)
Self-Shipping
For beginners, Flipkart Fulfillment is recommended because:
Faster delivery
Better visibility
Higher conversion rates
This is a critical stage in the flipkart seller registration process.
Tips to Get Your First Sales Quickly
After completing the flipkart seller registration process, focus on generating your first sales:
Use competitive pricing initially
Optimize product titles with keywords
Upload professional product images
Enable fast shipping
Run Flipkart Ads
🔥 Bonus Tip: Encourage early customers to leave reviews to build trust.
Common Mistakes to Avoid
Avoid these mistakes during the flipkart seller registration process:
Selecting the wrong product category
Uploading low-quality images
Overpricing products
Providing incorrect GST details
Delaying order dispatch
Fixing these early can save time and improve performance.
.
FAQ How to Create Shopify Store Step by Step
The flipkart seller registration process is completely free. You just need to sign up on the Flipkart Seller Hub, verify your mobile number, and submit your business details. However, Flipkart charges commission and fees only after you start selling products.
In most cases, GST is required for the flipkart seller registration process. However, if you are selling under certain categories like books or handmade items, you may be allowed to register without GST. It’s best to check category requirements before starting.
The flipkart seller registration process usually takes 1–3 working days if all your documents are correct. Once approved, you can start listing products and begin selling immediately on Flipkart.
Final Thoughts
The flipkart seller registration process is simple, beginner-friendly, and a powerful way to start your eCommerce journey in India. With the right setup and strategy, you can build a profitable online business from scratch.
Don’t Miss Out
Boost your ranking with targeting trends experts

About Author
Lakshay Yadav
Founder & Growth Strategist | 5+ Years Experience | Targeting Trends
Lakshay Yadav is a results-driven SEO specialist with expertise in on page SEO techniques, meta tags optimization, internal linking SEO, and page speed optimization. He has worked with multiple websites to improve rankings, increase traffic, and boost conversions.
His approach focuses on combining Google ranking factors 2026 with real-world strategies that deliver measurable growth.